
How to Make a Cat Cave Bed: Easy DIY Guide

Most cat owners know the scene well. You buy an expensive bed, yet your cat ignores it to sleep in a shipping box. Cats crave enclosed, tight spaces because it makes them feel safe. This instinct comes from their wild ancestors who needed to hide to sleep without being spotted by predators. If you want to provide your pet with a secure spot, learning how to make a cat cave bed is a great DIY project. You can save money, pick colors that match your decor, and customize the size to fit your pet perfectly.
Understanding How to Make a Cat Cave Bed: Needs and Styles
Before you grab your tools, you need to understand why cats love these spaces. Building a successful cave requires more than just picking a design. You must think about your cat’s needs first.
Feline Psychology: Why Cats Love Caves
Cats are both predators and prey. In the wild, a secure den protects them while they sleep. Being inside an enclosed space allows them to monitor their surroundings without being seen. This "cave effect" helps lower stress levels. Research shows that cats with access to hiding spots adjust to new homes faster and stay calmer during loud events. By building a cave, you give your cat a sense of control over their environment.
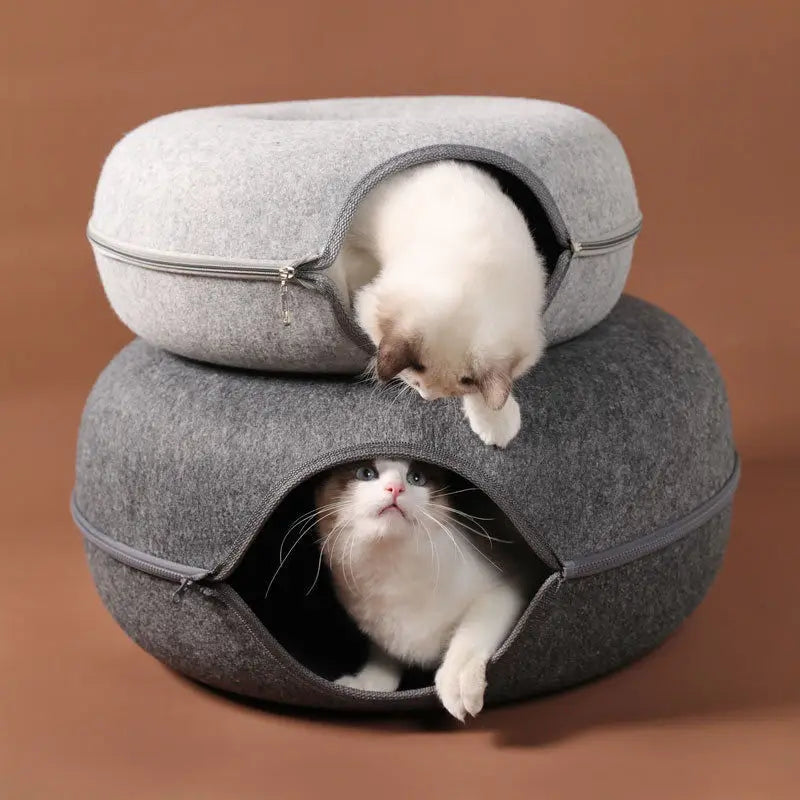

Material Selection: Comfort Meets Durability
Choose materials that are safe and easy to clean. Wool and felt are excellent choices because they hold heat well and provide a soft texture. If you choose fleece, make sure it is thick enough to hold its shape. Always avoid fabrics with loose threads or ribbons. Cats can swallow these by accident, which can lead to serious health issues. A heavy canvas or stiff felt works best for the outer shell to ensure the cave stays upright.
Suggested: Cat Behaviour and Body Language
Style Comparison: Identifying Your Best DIY Path
You can choose from several construction styles based on your skill level. The no-sew sweater method is the quickest, making it perfect for beginners. If you know how to use a sewing machine, you can create a structured felt dome. For those who want something very sturdy, a wireframe igloo is the best option. Match the style to your comfort level to ensure the project stays fun and achievable.
The No-Sew, Quick-Fix Cat Cave (The Sweater Method)
This method is the fastest way to get a bed ready for your cat. You only need a few household items that you likely already have.
Gathering Your Minimalist Supplies
You do not need a shopping list for this project. Grab an old, thick sweater, a sturdy piece of cardboard, a pillow, and safety pins or a heavy-duty needle and thread. Use a sweater made of natural fibers like wool or cotton, as these breathe better than synthetic fabrics. Ensure the sweater is large enough to fit over the pillow comfortably.
Step-by-Step Assembly: Creating the Structure
Start by folding the cardboard to form a base. Place the pillow inside the sweater, pushing it all the way down to the bottom. Fold the ends of the sleeves inward and tuck them inside the main body. Use a wire hanger or a piece of flexible plastic tubing to create an arch through the neck hole. This arch keeps the entrance open. Ensure the entrance is wide enough for your cat to walk in without feeling trapped.
Suggested: Do Cats Really Use Tunnel Beds
Enhancing Stability and Aesthetics
To keep the structure firm, secure the sleeve cuffs to the back of the sweater using safety pins or a few stitches. If the cave wobbles, glue a piece of felt to the bottom of the cardboard base. This adds grip so the bed does not slide across the floor. Check the inside for any loose threads and trim them away to keep the interior clean.
Advanced Sewing Project: The Felt or Wool Dome Cave
If you have basic sewing skills, a felt dome offers a more professional result. This design looks clean and lasts much longer than a quick-fix version.
Pattern Creation and Sizing Guidelines
Draft a dome pattern on paper first. A good rule of thumb is to make the diameter of the base 1.5 times the length of your cat when they are curled up. Cut your fabric into large, rounded triangular panels that will meet at the top to form the dome. Lay these out on your floor to check the shape before you cut your expensive fabric.
Suggested: Cat Tunnel Beds Vs Traditional Cat Bed
Cutting, Interfacing, and Joining the Panels
Use sharp fabric shears to cut thick felt. If the felt is thin, iron on some heavy interfacing to help it hold its shape. Use a zigzag stitch or a heavy-duty needle to join the panels together. A strong seam allowance is important here. You want to make sure the cave does not pull apart when your cat climbs inside.
Inserting the Entrance Hole and Finishing Touches
Once the dome is stitched, trace an entrance circle on the front panel. Cut the hole and reinforce the edges. You can use bias tape to cover the raw edge or use a thick blanket stitch around the opening. This prevents the fabric from stretching out over time and keeps the entrance looking neat.

Building the Sturdy Wireframe Cat Igloo
A wireframe cave is the most durable choice. It is ideal for households with multiple cats or for owners who want a modern look.
Selecting the Right Internal Support Material
Use heavy-gauge floral wire or flexible PVC piping for the frame. Both materials are easy to bend but strong enough to support the weight of the fabric. Ensure there are no sharp edges at the ends of your wire. Wrap the ends with duct tape or use rubber caps to keep your cat safe from pokes or scratches.
Constructing the Skeleton: Forming the Dome Shape
Create two or three arches by bending your wire or piping. Cross them at the top and secure the joints with zip ties. Use pliers to tighten the zip ties and trim the excess plastic. Place the frame on your floor to ensure it does not wobble. If it is uneven, adjust the tension of the zip ties until the structure is stable.
Suggested: Benefits of Donut Shaped Tunnel Bed
Wrapping and Upholstering the Frame
Cover the frame with a layer of batting or thin foam padding first. This softens the edges of the wire frame. Use spray adhesive to keep the batting in place. Drape your exterior fabric over the padding and attach it to the base. Use a curved upholstery needle to sew the fabric to the base. This keeps the cover tight and prevents it from bunching up.
Customization, Placement, and Maintenance Tips
A new bed is only useful if your cat actually uses it. Proper placement and care will ensure your project is a hit.
Optimizing Location for Maximum Use
Observe your cat to see where they usually sleep. If they like warmth, place the cave near a radiator during the winter. In summer, move it to a shaded spot away from direct sunlight. Keep the bed away from loud appliances or high-traffic areas. To encourage use, sprinkle a little catnip inside or place a piece of their favorite blanket in the bottom.
Essential Cleaning and Longevity Hacks
Cleaning depends on the material you used. You can toss felt or fleece caves in the washing machine on a gentle cycle. If you used a wire frame with upholstery fabric, spot clean it with a damp cloth and mild soap. Vacuum the inside once a week to remove shed hair. This keeps the bed fresh and prevents odors from building up.
Upgrading Your Cave: Adding Features
You can always add extras to your DIY cave. Attach a small, dangly toy to the top of the entrance to provide entertainment. You might add a removable inner cushion that is easier to wash than the whole cave. If the cave is in a dark corner, a strip of reflective tape on the back can help you spot it easily in low light.
FAQs: How to Make a Cat Cave Bed
1. What is the easiest way to make a cat cave bed at home?
The easiest method is using an old sweater and a pillow. You simply close the neck opening, add stuffing or a cushion inside, and shape the sleeves around it to form a soft enclosed cave. It requires no advanced tools and can be done in under an hour.
2. What materials work best for a DIY cat cave bed?
Soft, warm, and flexible materials work best. Thick sweaters, fleece fabric, felt, and even cardboard boxes with soft bedding inside are commonly used. The key is to choose something that creates warmth and a sense of enclosure.
3. Do cats actually like homemade cave beds?
Yes, most cats naturally prefer enclosed spaces because it makes them feel safe and protected. Homemade cave beds often work very well, especially if they are soft, warm, and placed in a quiet area of the home.
4. How do I get my cat to use a DIY cat cave bed?
Place the bed where your cat already sleeps or relaxes. You can also add familiar scents like their blanket or your worn clothing. Treats or catnip inside the cave can help encourage them to explore it.
5. How long does it take to make a cat cave bed?
It depends on the method. A sweater or cardboard cat cave can take 20–60 minutes, while fabric or felt designs may take a few hours depending on your crafting skills.
6. Is a DIY cat cave bed safe for cats?
Yes, as long as there are no sharp edges, loose threads, or unstable structures. Always ensure good airflow and make sure the bed is sturdy enough to hold your cat’s weight comfortably.
Conclusion
Creating a home for your pet is a rewarding project. Whether you choose a simple sweater bed or a complex wireframe structure, your cat will appreciate the effort. By focusing on security, comfort, and the right materials, you can create a sanctuary that matches your pet’s personality. Start with a simple design if you are new to DIY, or jump into a sewing project if you want a challenge. Either way, you will end up with a high-quality cave that offers your cat the privacy and safety they crave.

